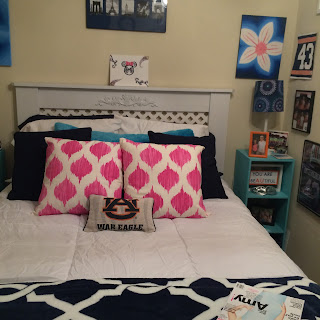
Hello everyone and I hope your week is going well so far. Today I am going to share with you the makings of my headboard. I know I said Wednesday, but I couldn't wait that long.
So basically, my dad did all the work, but I helped plan it.
My dad is an industrial designer, so when I worked with him over the summer it was easy to collaborate. He has this huge white board wall just for designs. Now, normally I just draw a bunch of Mickey heads, but this time me and him drew out the blueprint for what would be my fabulous, "Antebellum" headboard as my dad would call it. Here's the blueprint.
Then we went and picked out all the would. There was a 2x4, a 2x6, some smoother pieces for the top part, plastic white lattice, and a decoration that was yes, picked out by me.
My dad started to build when he got home from work the next day and pretty much already had the base.
Then I sanded it and painted it.
He attached the lattice and then we attached the decoration together.
It really turned out awesome and I love it. Eventually, I am going to add twinkle lights to the lattice and add some mood lighting.
Here's what it all looks like finished and put together. It was so much easier than you would think and we used all RYOBI tools to do it.
I hope you liked this DIY headboard and I hope it gave you an idea or two if you need them. Let me know what you thought in the comments below and be sure to keep an eye out for the rest of my new room decorations. Have a wonderful day and week!
Don't forget to go follow MoonieMagMalan on Instagram, and go like us on Facebook. If you prefer Pinterest, search Malan Lynn(<<<<<That's Me!) and go follow my Moonie-Mag Board. I have also recently turned my good old Twitter account into a Moonie-Mag account, so don't forget to go follow that also.


No comments:
Post a Comment